This tutorial was written for psp'ers who have a good working knowledge of PSP 6.
If you would like to offer any of my tutorials to your groups or classes, please contact me first. Please list the name of your group or class, and your website if you have one. Thanks so much!
If you like my Paint Shop Pro tutorials, be sure to take a peek at my new tutorials at Debbie T Designs. Learn how to build your own web site with free tutorials for xhtml and css!
|
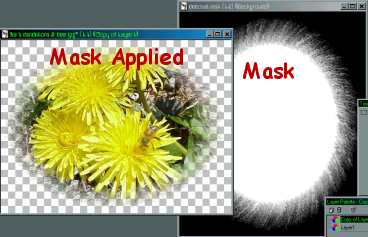
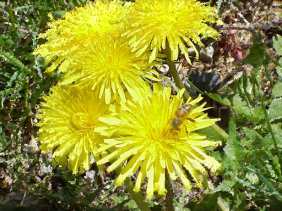
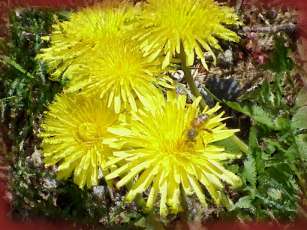
Masks are confusing and sometimes hard to understand. My theory is that their use is so varied that it is hard to get a handle on them. Let me try to explain them this way: This tutorial will use the mask to clear or fade parts of an image. Masks are grayscale. The black portion of a mask will clear what ever it is placed on, and the white part will leave it as is. So, if you have a big black circle in the middle of a white background and you apply that as a mask, then the image you applied it on will have cleared area in the middle the size of the big circle, but the rest of the image will be the same. Any gray colors in the mask, will be faded depending on how dark the gray is. On your PSP6 installation disk, you will find masks in the EDGES folder. Copy them to a separate folder on your hard drive - I save all mine in a folder named "Masks". This tutorial also uses a PSP/Photoshop plug-in named Paint Engine. It is very easy to install and it is FREE!! Just follow the instructions in the "readme" document for placement of files after it is unzipped. 1. Open up the image that you would like to use for these effects. A color photograph works well. If the image is not saved as .psp yet, then "SAVE AS" .psp now. If the first layer is a "background" layer, then double-click and rename/change to "layer 1". 2. Click Layer >Duplicate. This makes a copy of the layer 1. Make the new layer active. 3. Click Masks >LOAD FROM DISK - and navigate to the mask file that you want to use for this tutorial (You can use the File> Browse beforehand to see the shapes of all your saved masks). I used Oval5.msk -- Click Masks> DELETE. And then answer YES. You will not notice any changes to the image at this point -- hide layer 1, and then you will see that the edges of the image were deleted into the shape of the mask.
| |
|
5. With layer 1 still active, double-click the SELECTION tool. My image's dimensions are 512 x 384, and I want my selection to be 15 pixels from each edge. (You can decide how large you want the edge area to be in comparison to your image size.) In the LEFT box I used "15" - RIGHT box "497" (512 minus 15) - TOP box "15" - BOTTOM box "369" (384 minus 15). |
6. Click Selections> INVERT. This makes a selection frame around the image. Click Selections> MODIFY> FEATHER> 15. Click Masks> NEW> SHOW ALL. Then click Masks >EDIT. Next click Masks >VIEW MASK. If you click on the foreground or background colors, you will see that all the colors are shades of black, white, or gray. This is because masks are grayscale. | |
 |
7. Click on the FLOOD FILL tool; In the tool options dialog box, I used Linear Gradient as fill style -- black and white for the gradient colors -- repeats 3 -- angle 48. Flood fill inside the selection. You will see shades of red as the fill. This is normal when the mask is being viewed. Click Masks> View Mask to uncheck that setting. You should now see the a fading transparency layer in the selection frame. Click Masks> DELETE> Yes. |
 |
8. Selections> SELECT NONE. Add a new layer - name it "backfill", then drag that layer to the bottom of the layer palette. Click on the FLOOD FILL tool, but this time, use a solid color as the setting. I used a dark reddish color. Flood fill the backfill layer. 9. Click on Image> EFFECTS> TEXTURE -- I used these settings, but you can use whatever looks good with your image. |
 |
|
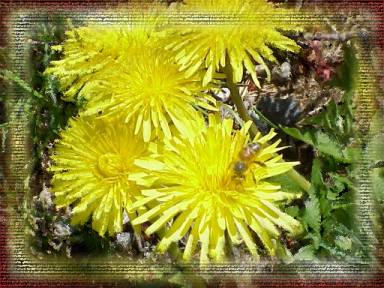
10. Make Layer 1 the active layer -- (this is the layer that we applied the Paint Engine effect to). Add a new layer. Name it "frame". Double-click the SELECTION tool again. This time, I used want the selection to be 50 pixels from the edges. My settings - LEFT(50), RIGHT(462), TOP(50), BOTTOM(334). Use the appropriate numbers for the dimensions of your image. Just take the width and height and minus 50 for the right and bottom settings. Selections> INVERT. The selection should be a frame around your image now. 11. Click Selections> MODIFY> CONTRACT> 15. Then click Selections> MODIFY> FEATHER> 15. FLOOD FILL with color -- I used Linear Gradient preset of Yellow Metallic Repeats 0. 12. Now click Masks> New> SHOW ALL. Next, click Masks> Edit -- and then Masks> View Mask. Click on the FLOOD FILL tool and select the Linear Gradient, select Black-White, angle 48, Repeats 12. You might find a different repeat amount or angle will look better for your image. Then when you have your mask transparency just right, click Masks> DELETE> YES. 13. Click Image> Effects> TEXTURE> and use the same settings as before. Click Selections >SELECT NONE. You can try different effects with this -- try applying a Glass/Antique Mosaic, Sculpture, Blade Pro, or Eye Candy effect. | |
|
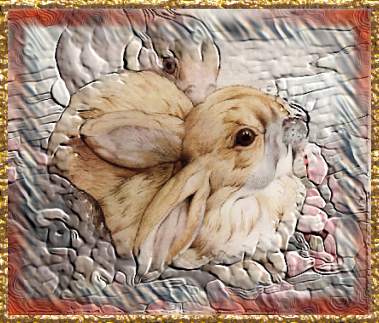
Here are two more examples. Thanks for your support! ~ debbieT ~Learn (x)HTML & CSS ~ Paint Shop Pro Tutorials ~ Contact debbieT ~ Beginners ~ Free Backgrounds ~ Home
Website Design & Graphics created by debbieT
and DisDat Designs
|
|