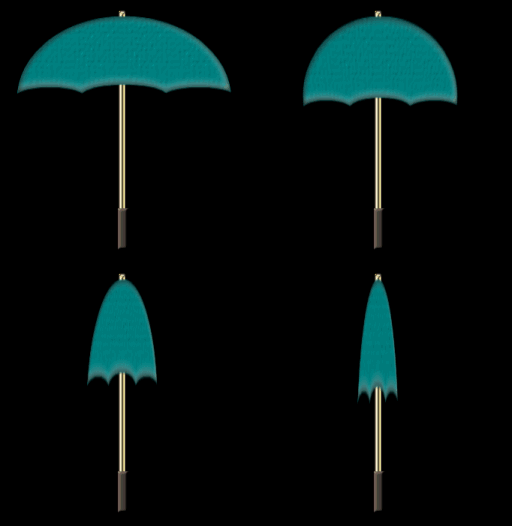

This tutorial was written for psp'ers who already have a good working knowledge of PSP 6.
If you would like to offer any of my tutorials to your groups or classes, please contact me first. Please list the name of your group or class, and your website if you have one. Thanks so much!
If you like my Paint Shop Pro tutorials, be sure to take a peek at my new tutorials at Debbie T Designs. Learn how to build your own web site with free tutorials for xhtml and css!
|
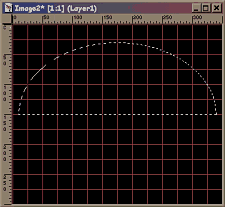
If needed, click to download the zip file for this tutorial - it includes the umbrella selection and a gold Blade Pro preset. 1. Create New Image 350 x 300, Color of your choice or Transparent for the Background. Add new layer. 2. Click on the Selection Tool: Ellipse, Antialias CHECKED. Start in the center of image (175x150) and select an area about 330 x 240. |
|
|
3. Now choose the Rectangle Selection, so we can remove the bottom half of the ellipse. While holding down the Ctrl key, start at the 150 mark outside the left edge of the ellipse, and make a rectangular selection that encloses the whole bottom ½ of the ellipse. This is what my image looks like so far. Do not De-select. ***Please note: My examples are sized smaller to save space. |
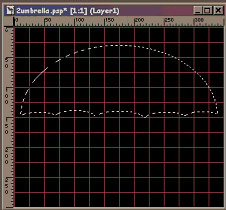 |
4. Now we want to shape the bottom of the umbrella, by "cutting" out 3 or 4 ellipse selections. Move your cursor to the middle and a little bit below the bottom selection line and work out from the middle to space out 3 or 4 selections. One hint is when one ellipse is made, overlap the next one a little bit so the points are not so pronounced. It might take you more than one try - use Edit >Undo to go back. If you cannot seem to get it right, click here for the umbrella zip file - it includes the umbrella selection I made. After it is unzipped, click Selections >Load from Disk and navigate to the selection file. This is what my image looks like after the selection is modified. And save your image with a .psp extension. |
5. Phew, now that the toughest part is over - Change your foreground color swatch to the color you want your umbrella to be. Click on the FLOOD FILL tool, and fill the selection with your color choice or you can use a pattern. Add a texture to it if you want, click Image > Effects > Texture. 6. Now we want to make it look a little more 3-Dimensional. Keep the umbrella selected. Click Selections > Float. Click Image >Effects >Cut-Out: Shadow(Black), Opacity(70), Blur(8), Vertical&Horizontal(-3). Then apply the Cut-Out again, but use Shadow(Black), Opacity(57), Blur(8), Vert&Horz(2) | |

|
7. Now we are going to create the pole/handle. Create a New Image, 100 x 500 - Transparent. Make "White" your foreground color. Click on the LINE DRAW tool. Choose Straight Line, Stroked, size 11, and Antialias, Vector, Path all NOT CHECKED. Draw a straight line whatever length you want the umbrella pole/handle to be. Click on the SELECTION MAGIC WAND and select the line - Feather 0. At this time, you can apply a blade pro gold setting (The one I used is included with my Umbrella Zip file. Or if you don't have Blade Pro, FLOOD FILL with a golden yellow color, and click Image >Effects >Inner Bevel >settings: Round shape, Width(2), Smooth(13), Depth(5), Ambience&Shininess(0), Color(white), Angle(315), Intensity(50), Elevation(30) - or experiment with your own. |
 |
8. De-select all. Add a New Layer. Click on the LINE DRAW tool. Same settings as before, except the size will be 15. If you are using Blade Pro, use white as your foreground color, if not, use the color of your choice. Draw a fat line for our handle at the bottom of our pole. Select the handle. Apply a Blade Pro setting. Or if you are without Blade Pro, add an optional Texture and then use the Inner Bevel. If the handle is not lined up correctly with the gold part, then use the MOVER tool to adjust it. Now, Layers >Merge Visible. |
|
9. We are ready to put it all together. Create a New Image, 500 x 500 - transparent.
Activate the pole/handle image. Edit >Copy. Paste as New Layer into our
new image. Activate the umbrella image, make sure you are on the correct layer,
and Edit >Copy. Then Paste as New Layer in our new image. Use the MOVER
tool to adjust the position of our umbrella and handle. Make sure that the
top of the pole/handle is viewed as the tip of the umbrella. If you need it
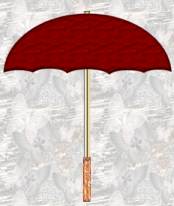
to be longer, click the DEFORMATION tool You could add a flood fill background to Layer 1 or leave it transparent - Do NOT merge layers at this time. But you might want to resize your image. I resized by 85%. The image to the left is what my image looks like at this point (just a bit smaller for file size) Save our image as umbrella1.psp |
Learn (x)HTML & CSS ~ Paint Shop Pro Tutorials ~ Contact debbieT ~ Beginners ~ Free Backgrounds ~ Home