
If you would like to offer any of my tutorials to your groups or classes, please contact me first. Please list the name of your group or class, and your website if you have one. Thanks so much!
If you like my Paint Shop Pro tutorials, be sure to take a peek at my new tutorials at Debbie T Designs. Learn how to build your own web site with free tutorials for xhtml and css!
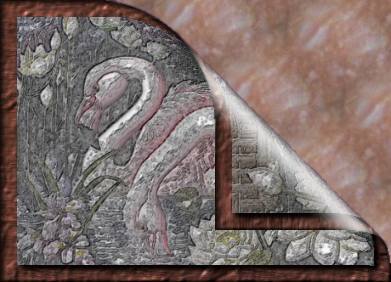
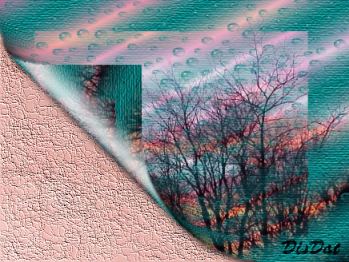
The Page Turn in Animation Shop has a different look than the one that can be applied in PSP 7. The backside of the page is transparent, and I find it easier to control than the effect in PSP.
1. Open the Animation Shop Program. Open a favorite .psp image you have created. The best image would have one layer, be rectangular and have no transparent edges.
2. Click on Effects >Insert Image Transition. Scroll down the Effects drop-down menu, click Page Turn. In the "Start With" area, click animation frame, and your image should be in the preview pane. In "End With" area, click Canvas Color -- the background should be transparent. If you want more control over the effect, click on "Customize" and experiment with the settings. Click OK.
3. There should now be several animation frames. Use the scroll arrows to scroll through the frames, until you find a frame that has a good placement of the turned page. I chose Frame #12. Click on the frame to select, and then EDIT >COPY.
4. Open PSP 7, and click EDIT >PASTE >PASTE AS NEW IMAGE. This should paste the frame you have chosen as an image in the psp workspace.
5. If any edges have the "jaggies", select the RETOUCH tool.
![]() and on the second tab on the tool options, choose "SOFTEN". On
the first tab, use my settings.
and on the second tab on the tool options, choose "SOFTEN". On
the first tab, use my settings.
Use the RETOUCH brush, and very slowly and carefully soften the jaggies on the edges of your image. Just make sure the brush size is very small -- size 2 or 3. If you soften too large of an area, or make a mistake, use the UNDO button, and try again. Try to use separate soften strokes instead of one long motion.
6. Add a DROP SHADOW -- settings I used: Vertical & Horizontal(4), Transparency(90), Blur(14)
7. Add a new layer, and drag that new layer down under your page layer. You can FLOOD FILL some color to your new layer for the background. Choose either a pattern for your foreground color and use that for the layer fill. Or choose a solid color and texture for your foreground color and solid color with NO texture for background color. Choose colors that will compliment the colors in your image. RIGHT-CLICK to flood fill with the background color, then LEFT-CLICK to apply the textured fill. (see my Color Palette tutorial if needed) And that is it!! Save as .psp extension. Then Merge visible layers, Resize and FILE> EXPORT as .jpg extension.
Page Turner Example 1 ::: Page Turner Example 2
Learn (x)HTML & CSS ~ Paint Shop Pro Tutorials ~ Contact debbieT ~ Beginners ~ Free Backgrounds ~ Home