Intermediate PSP7 Tutorial
Making Seamless Background Tiles
with the Snap To Grid option.
Knowledge of PSP 7 Tubes and Layers assumed.
If you would like to offer any of my tutorials to your groups or classes, please contact me first. Please list the name of your group or class, and your website if you have one. Thanks so much!
If you like my Paint Shop Pro tutorials, be sure to take a peek at my new tutorials at Debbie T Designs. Learn how to build your own web site with free tutorials for xhtml and css!
Grids and Rulers make creating images easier. You can precisely align a selection or create perfectly matched shapes. And with the new addition of "snap-to grids" to Paint Shop Pro 7, it makes it even easier and quicker.
By clicking on :File >Preferences >General>Rulers&Units you can change the grid horizontal & vertical default spacing and line color. I like to keep my default spacing at either 25 or 50 and my line color is dark red.
In PSP 7, there an option of changing the active image's grid
properties. Click on View> Change Grid Properties
(**note: when this grid setting is changed it is only for that particular
image -- when a new image is created, the grid properties for that new
image will be from the your File >Preferences >General>Rulers..
Settings.)
1. Okay now we are ready to begin -- create a new image 206x206, transparent. **It is important to use these particular dimensions for the size of our image, because we will be cropping later and the final image size we want to end up with will be 200 x 200.
2. This is the part where you can let your individual creativity come out...Take a bunch of tubes and just go crazy...add some colored spheres, some flowers, some spiders. Whatever theme you would like your background tile have. I am going to use some summertime tubes.
Add your tubes, but do not let any tube go out over the edge of your image (including any shadows in your tube image). Keep them at least 3 pixels from EACH edge -- we are going to crop off the edges later and you don't want to lose any of your tube images.
If it makes it easier, make a new layer for every batch of tubes you add and then use the mover tool to arrange each layer. You can save your image at this time. Save as .psp extension. (If you plan on opening your image in previous versions of psp, then click on the options button, and choose the appropriate compatibility).
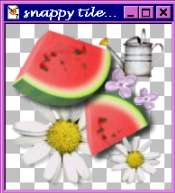
3. This is what my image looks like so far - I used 5 layers. - Now merge your visible layers: Layers >Merge >Merge Visible (Merge Visible keeps the transparency)
4. Change your foreground color to a light color. And make your background color swatch white. Choose a TEXTURE for just the foreground color. I am choosing "Terrain". Choose a texture that will not be too bumpy.
5. Add a new layer, and drag it to the bottom of the layer palette under the tube layer.
6. Using the FLOOD FILL tool, RIGHT CLICK on your mouse and fill this layer with the white background color. Then LEFT CLICK with the FLOOD FILL tool; it should have filled it with a textured foreground color - cool, huh? Okay, now click Layers >Merge >Merge Visible. Save Save Save!!!

Learn (x)HTML & CSS ~ Paint Shop Pro Tutorials ~ Contact debbieT ~ Beginners ~ Free Backgrounds ~ Home